Hydraulic Bolt Tensioning
The correct bolt tensioning procedure has been shown to be a better method of bolt tightening.
The loads are induced by hydraulically “stretching” the stud bolt to a required design load. Once the bolt has been stretched, the load retaining nut is then tightened down by rotating the nut in a clockwise direction until it comes in contact with the flange face. The pressure in the hydraulic load cell is then slowly released allowing the residual bolt load to be transferred to the bolts.
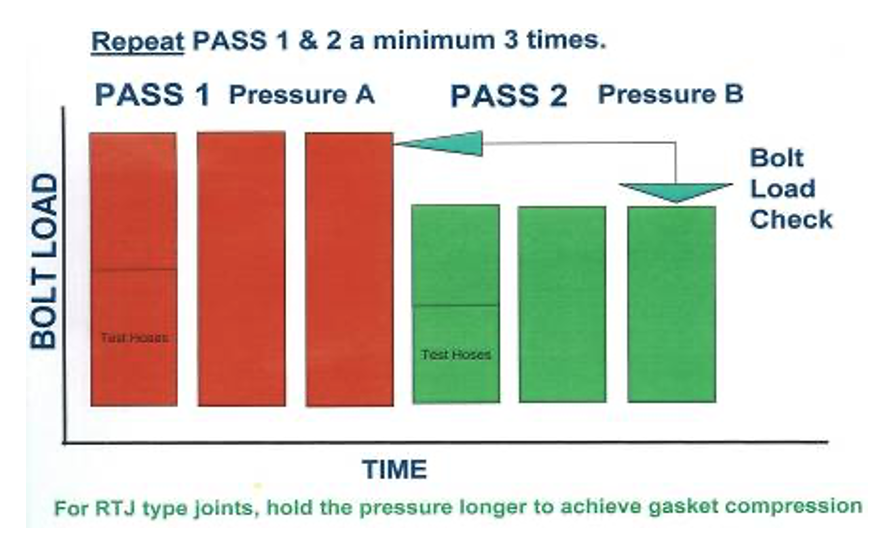
This tightening process should be repeated a minimum of three times.
We recommend that a minimum 50% bolt tensioning is carried out, but we can carry out 33% & 25% if required. 100% bolt tensioning is the best procedure but mainly used in sub-sea environments.
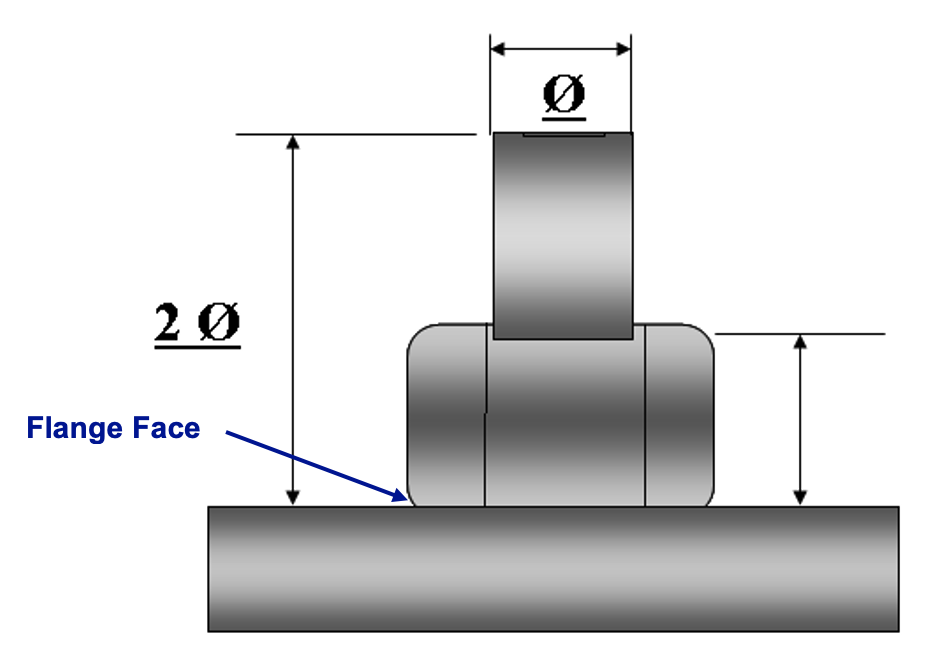
When using Bolt Tensioners we require a minimum of 2 diameters of thread extension above the flange face.
Bolt tensioning requires trained / competent personnel to carry out the installation and use tensioning equipment.
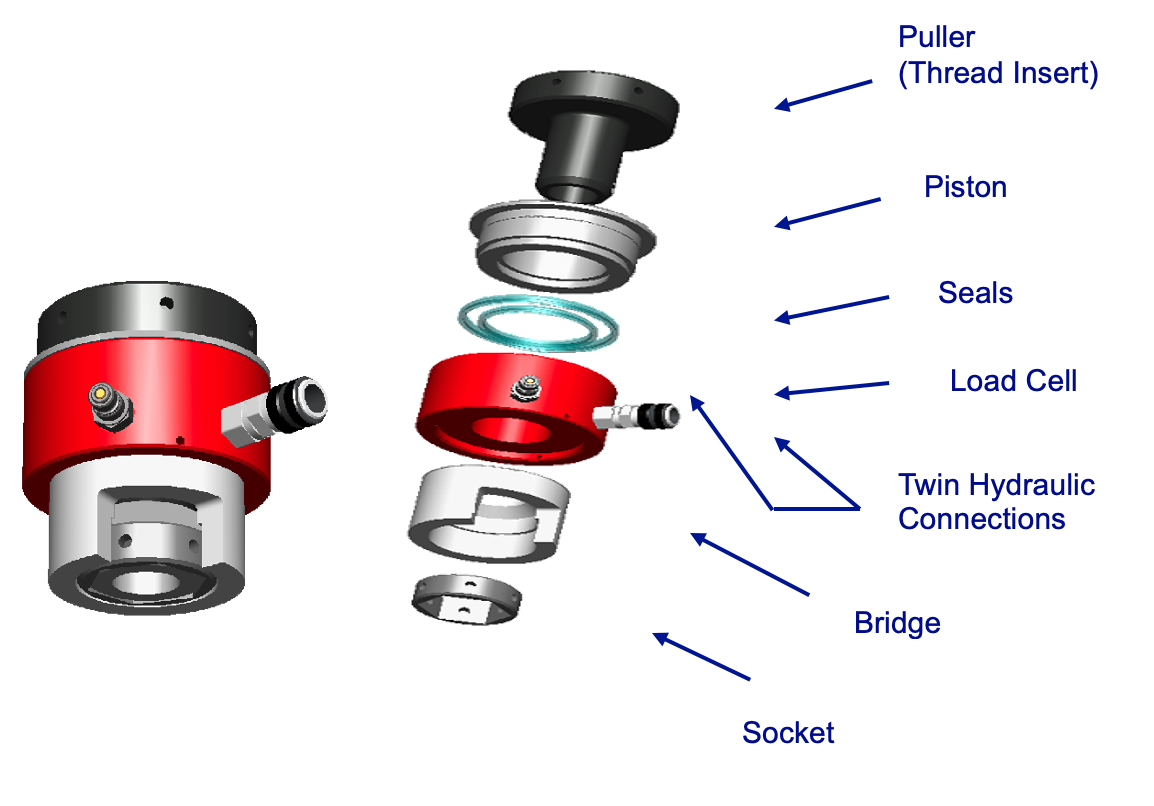
Bolt Tensioner(s) as shown above are correctly fitted to the appropriate stud bolts after checking:-
Flange surface has been cleaned of any debris that could affect the required residual bolt load.
Bridge sits level and evenly on flange surface and does not affect the weld-neck of the pipework.
The thread form of the puller matches the bolt thread form.
Thread engagement is sufficient to enable the minimum contact with the bolt threads (minimum of two bolt diameter above the flange face)
Hydraulic hoses inter-connect to each tensioning tool and then a feed hose is connected to the hydraulic pump unit.
Confirm that all of the hydraulic connections are correctly made.
Keep all the hydraulic couplings clean and free of dirt and fit the protective caps to the hoses when not in use.
Connecting multiple quantity’s of tools together and pressurising them at the same time, provides even compression on the gasket and reduces the possibility of any damage occurring.
100% Tensioning
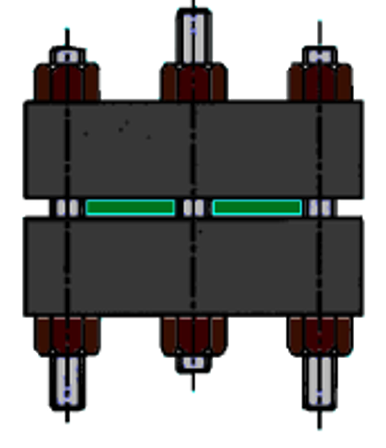
To tension all of the bolts at the same time, unrestricted access to both sides of the flange is required.
The bolts are arranged so that 50% of the tools can be fitted to one side of the flange and the remaining 50% are fitted to the opposite side of the flange.
Tensioning Procedure: 100% Tensioning Procedure uses Pressure B only.
50% Tensioning
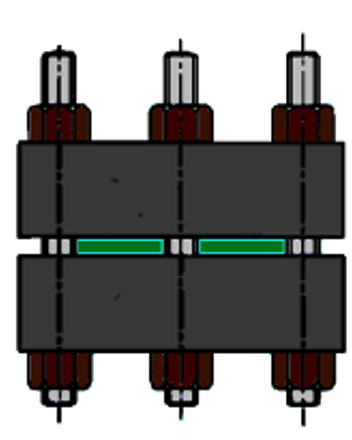
Topside tensioning is normally carried out by fitting the tensioning equipment to every other bolt, meaning that to enable the correct tightening procedure for the flange to be carried out, we have to apply a ‘A Pressure’ and a ‘B Pressure’. This procedure enables the joint to be tensioned correctly, maintaining the correct residual bolt load.
When access is somewhat restricted, we can still carry out the tightening procedure by fitting some of the tensioning tools on the opposite side of the flanges.
Tensioning Procedure:
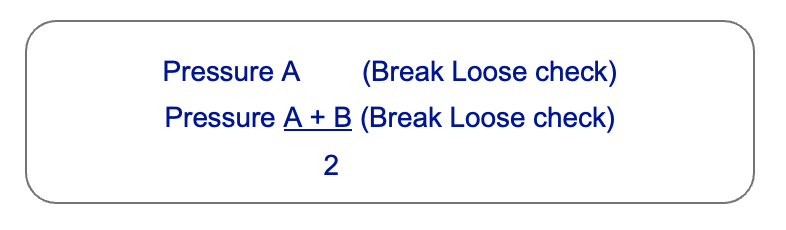
50% Tensioning Procedure uses Pressure A (Break Loose check on A Pressure B)
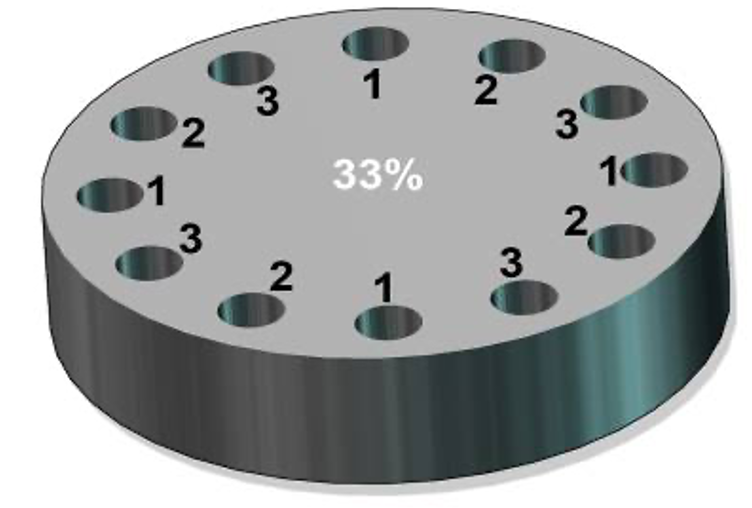
33% Tensioning
Anything less then 50% tensioning would not be recommended normally but can be carried out as long as there are a minimum of 12 bolts in the flange. It will increase the time taken to tighten the flange.
Tensioning Procedure:
33% Tensioning procedures uses
It often helps if you number the bolts in groups:
The bolts can be tensioned from one side of the flange only unless there are any obstructions, and then some of the tensioners can be fitted to the opposite side of the flange.
The tightening process will require multiple passes to be made due to the increased load transfer that takes place during the tightening.
The bolts can be tensioned from one side of the flange only unless there are any obstructions, and then some of the tensioners can be fitted to the opposite side of the flange.
Tensioning Procedure:
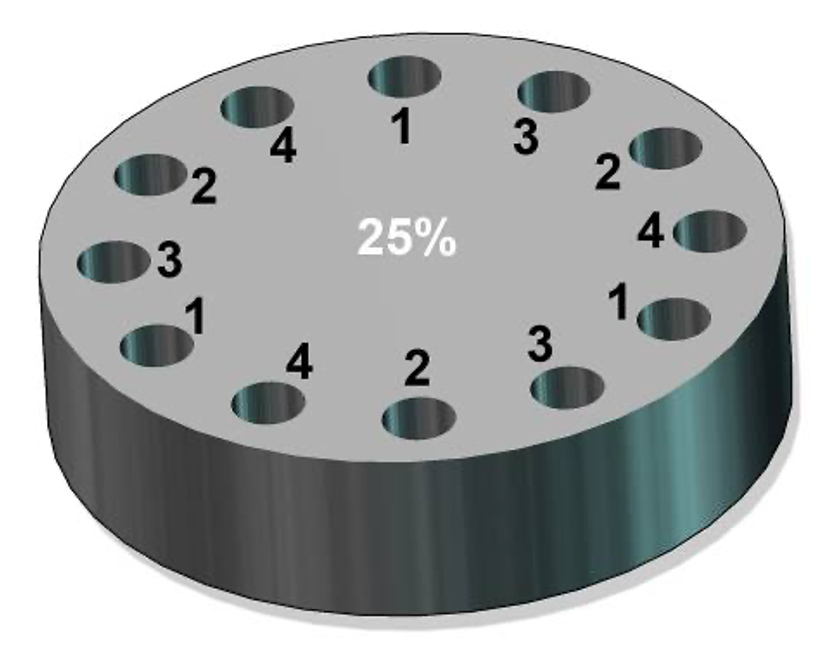
25% Tensioning procedure use
- Pressure A (1) (Break Loose check)
- Pressure A (2) (Break Loose check)
- Pressure B (3) (Break Loose check)
It often helps if you number the bolts in groups.
Marking of bolts to indicate pass number is recommended.
The pressurisation of the bolts should be carried out a minimum 3 times. The pump unit is required to maintain the required pressure whilst the tightening of the bolts is carried out. Once all of the bolts have been tightened the hydraulic pressure in the system should be fully de-pressurised before repeating the process.
Typical example of a 50% tightening procedure:
The A & B pressures are supplied to the responsible person who will be carrying out the work. The values will differ depending on the size and rating of the flanges as well as other factors:-
- Pipeline operating pressure and temperature
- Gasket type
- Flange type and material
- Pipe wall thickness
- Pipe material
- Percentage of tools used (100%, 50%, 33%, 25%)
- Bolt material
Check that all pressures specified are suitable for the application.
AIS recommend the development of flange specific bolting specifications.
To maintain the residual bolt load a break loose check must be carried out.
The break loose check is a procedure that utilises a single tensioning tool fitted to a stud bolt and connected via the feed hose to the hydraulic pump unit. Minimal pressure is maintained on the tommy bar in an anti-clockwise direction whilst slowly building up the pressure in the system until the nut releases. At this stage we stop the hydraulic pump and re-tighten the nut in a clockwise direction. We then check the pressure gauge to confirm the bolt load found.
If the pressure is found to be acceptable, then the pressure can be released from the system and all of the tools removed and stored ready for the next use.
If the pressure is found to be lower than the ‘B’ pressure, we must repeat the tightening process in the reverse order until the bolt load check is acceptable.
Before leaving any joint, we should check that all of the bolts are tight by tapping them with a spark resistant hammer to check the sound of the bolts are all the same, it also assist’s in checking that we have not missed any of the bolts.
THE ASSEMBLY AND TIGHTENING OF BOLTED FLANGED CONNECTIONS SHOULD BE CARRIED OUT ONLY BY OPERATIVES TRAINED AND COMPETENT TO THE STANDARDS OF THE ENGINEERING CONSTRUCTION INDUSTRY TRAINING BOARD NATIONAL SKILLS DEVELOPMENT SCHEME UNIT No’s MJI 18.
Bolt Tensioning – Do’s and Don’ts
Do’s
- An understanding of the procedures explaining the use of the equipment and the safety precautions is essential.
- Confirm that the pressures required for the application are acceptable.
- Ensure the minimum 2 diameters of thread extension above the flange face have been achieved.
- Tighten all of the load retaining nuts by hand first of all, by making sure that the correct face of the nut will seat squarely onto the flange surface.
Don’t’s
- Never stand in direct line with the bolt axis or place your hand on top of the tensioning tools whilst pressurising the tools.
- Any damaged bolts should be replaced prior to the tightening operation.